| Version 7 (modified by , 12 years ago) (diff) |
|---|
Languages:
- English
- Español
First Time User Guide: Organizational Unit Administration
This is a guide for working with OpenGnSys Administration Console.
Once we have entered the administration console in Admin Console?, we have created an organizational unit and we have assigned an administrator, we can proceed to manage one's own organizational unit.
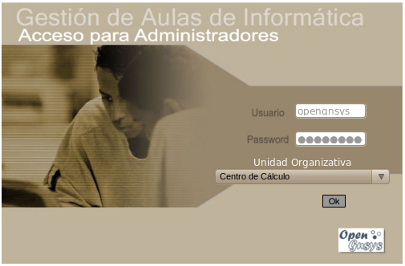
Console Access
 | We can access to Admin Console by writing in the browser's address bar the following: http://[ip_of_server]/opengnsys.To access to the Organizational unit we should use the name and password of administrator that we assign and select the organizational unit in drop-down list |
Introduction to the elements from the top menu

- Classrooms: This option will add objects as computers, group and perform operations on them.
- Actions: This option will manage the actions for apply or to program to the computers.
- Images: This option will allow Esta opción nos permite gestionar la información de los objetos imágenes. - NOTA: antes de crear cualquier imagen, se ha de definir previamente desde esta opción.
- Hardware: From this option, we can manage the hardware of the organizational unit.
- Software: From this option, we can see the software list of our images.
- Repositories: From this option, we can manage the repositories (images containers) assign to the organizational unit. NOTE: Automatically, during the installation a default organizational unit is generated, including a default repository. If we create an organizational unit, the first thing to do is to register the repository.
- Menus: From this option, we can manage the menus offered in the clients console.
- Help: Show info about OpenGnSys API.
- Exit:
Repository Management
- By using a new Organizational Unit (OU), we should verify the repository data.
- The Organizational Unit "default" have assigned the repository "default".
| If you have a second organizational unit you should register the repository. We assign * to the name that identify it * and IP of the repository (the same repository can be used in several organizational units). | 
|
In Gestión de repositorios you can find more information about this.
Insert classroom
On the Organizational Unit, right-click mouse and select add new classroom. Next enter the correct details to our classroom:
- Computers: We should assign a maximum number of computers in the classroom
- Network
- router: IP router of the classroom.
- netmask: netmask of the classroom. i.e. 255.255.255.0
- Protocol P2P
- Mode P2P: how the computer performs when you download an image. Possible values are:
- leecher: the computer no sharing while it is downloading an image.
- peer: the computer sharing image data while it is downloading.
- seeder: mode working distributed where a Master client is serving an image.
- P2P time (seconds) as seeder: Whatever of the working mode of the P2P client for downloading, we can define that once you have the whole image in the cache partition, it is dedicated "X" seconds to share it to other clients.
- Mode P2P: how the computer performs when you download an image. Possible values are:
- Protocolo Multicast.
- multicast: with two options: full-duplex and half-duplex (use full-duplex)
- ip multicast: multicast direction for this classroom: 239.194.x.z where x is the second octet of the IP network of the classroomm, and z is the third octet. e.g. If the IP direction of aula_virtual_1 is 172.17.36.0, the IP multicast corresponds: 239.194.17.36. In the case of our network has two classrooms and we need to use simultaneous multicast, we should assign the IP multicast of 239.194.17.37.
- port: it is the port, where the computer sends by multicast, sincronized with the computers. Values may be even from 9000, e.g.: 9000, 9002, 9004, 9006 ..... Preferely, you should use 9000, and in the case of ip multicast, if we have two classroom in the same network, you should assign the first classroom to the port 9000 and the second to 9002.
- speed: It is the maximum speed in Mbits/second. The maximum value allowed by the clone motor is 90 mbits - there are test with gigabits with excellent results.
- repository: We assign the repository of that class (this value affects only computers that are currently in the classroom).

Register OpenGnsys Computers
Add computer to dhcp
- We have to add the computers in dhcp service with the IP address assignment automatically.
- In the dhcpd configuration file, there are an example of the computer definition. (/etc/dhcp3/dhcpd.conf)
Integrate computers in OpenGnSys from web
Integrate computers into the classroom
In one step you can incorporate multiple computers to the classroom.
Right-click on classroom, select add computers and in the right side of the window, it appears a text box: Integrate computers.
In the text box, from dhcpd.conf we can copy the contents of the hosts as you can see in the figure.
Click on accept, you should to change the window for updating the classroom and seeing the computers, i.e., click on Actions and next on Classrooms.

It is recommended, since the properties of the classroom, reselect the default repository for all computers in the classroom and click the Accept button.
Add new computer
From this option, you should incorporate a computer to the organizational unit.

- Info about IP address field, we need to make sure not to leave spaces at the beginning or end of the address.
- Info about MAC address field, we need to make sure not to leave spaces at the beginning or end of the address.
- It is mandatory to assign the repository that uses the new computer.
- The format of MAC address is without spacers between the hexadecimals blocks. For example: 90e6ba8172a3
- NIC ID: The option by default is eth0. If our client have multiple NIC, we should to assign which one you use to connect to the OpenGnSys server.
- The other field is the ID of the network controller. Initially the client of this review has great support for these drivers, for this reason always this field is "generic".
Updating data for multiple computers
On the grouping of classrooms, click on Propierties, and the last fields are applicable to all the computers in this area.

This option is very useful to assign menus and confirm the appropiate repository.
Booting of OpenGnSys clients
- The web application of OpenGnSys manages the boot of computer registered on it.
- A computer manages by OpenGnSys will show a pxe menu at boot time by default. Users can choose between two boot types. The first one will boot from hard disk (default option) and the second one will boot from PXE (with the operating system that handles the deployment).
- This type of booting should (must) be modified for working in native mode with OpenGnSys.
- Native mode of OpenGnSys is when the computer booting with the PXE operating system OpenGnSys (og client):
Doing the schedule task or pendings to do.
Showing an user menu with multiple login options to the operating systems that the computer have installed in the partitions.
Doing a connection with the management server OpenGnSys for carrying out the task on demand.
To doing a native computer of OpenGnSys we should:
- On a classroom select "Remote Bootloader",
- Moving the computer or computers to the option on the left, named "ogclient". With the buttons [in] [out], we can move the computers to leave then on the option desired,
- and click on Save.
The differents elements offered by the boot loader are:
- ogclient - PXE client of OpenGnSys without administration console, and with read-only access to the Repository.
- ogclient-admin - PXE xlient of OpenGnSys, with administration console, and with write access to the Repository. It is set to perform a boot process in debug mode which informs the administrator about the process and provide access points to the shell for debugging.
- mbr 1hd - The computer always boots by the boot loader defined in MBR of the first hard disk.
- 1hd 1partition - If exists a boot loader installed, the computer boots from this partition.
- 1hd 2partition - If exists a boot loader installed, the computer boots from this partition.
Attachments (1)
- P8_acceso_consola.png (90.0 KB) - added by 12 years ago.
Download all attachments as: .zip
